In the rapidly evolving world of cannabis processing, the KannaMill stands out as a reliable and efficient solution for precision grinding. Whether you’re a seasoned professional or a newcomer to the industry, setting up your KannaMill correctly is crucial for optimal performance. This step-by-step guide will walk you through the process, ensuring you unlock the full potential of your KannaMill.
Step 1: Unboxing and Inspection
Begin by carefully unpacking your KannaMill and inspecting all components for any signs of damage during shipping. Verify that you have received all the necessary parts listed in the user manual.
Step 2: Placement
Choose an appropriate location for your KannaMill. Ideally, it should be placed on a stable surface with ample ventilation. Ensure there is enough space around the mill for easy access and maintenance. Additionally, it is important to keep in mind that you need to have the proper power available within your space. Our KannaMill 4 only requires single phase power, while the KannaMill 12 and 16 require three phase power.
Step 3: Assembly
When assembling the mill, ensure all connections are secure and follow the manual’s guidelines to avoid any potential issues during operation. Assembly typically involves the following steps:
- Locate the casters that came with the machine and bolt these with the supplied hardware to each stand leg.
- If the mill itself was shipped without being bolted to the stand, use a crane or fork truck to lift the mill and place it on top of the stand. Be sure to line up the holes properly to make the next step go smoothly.
- Locate the supplied hardware and bolt the mill to the stand.
- The discharge chute should also be separate from the mill itself and should be bolted to the underneath of the mill with the supplied hardware.
- Locate the flex hose, clamps, and collection bin. Place a clamp on to the discharge chute and lock in one end of the flex hose to the chute. The other end of the flex hose connects to the larger port of the collection bin.
- Remove the dust collector that was included with the mill and follow the install instructions. The hose will connect to the smaller port on the lid of the collection bin. Make sure you use either the foam filter inside the dust collector, or the paper filter that was provided, but not both.
- The collection bin should be placed beneath the mill with the flex hose perpendicular to the ground.
Step 4: Connection the Power (Plug it in)
Connect your KannaMill to a reliable power source as specified in the user manual. Double-check the voltage requirements to avoid damaging the equipment. Make sure to use the provided power cord and follow all safety precautions outlined in the manual. If your mill requires three phase power, please contact an electrician to hardwire a plug to the supplied motor starter. An outlet on the closest wall should also be supplied by the electrician. Once you have power going to your mill, take a moment to get familiar with the motor starter by referencing the supplied owner’s manual that came with the mill. Please note, your mill is either programmed for 1800 or 3600 rpm’s.
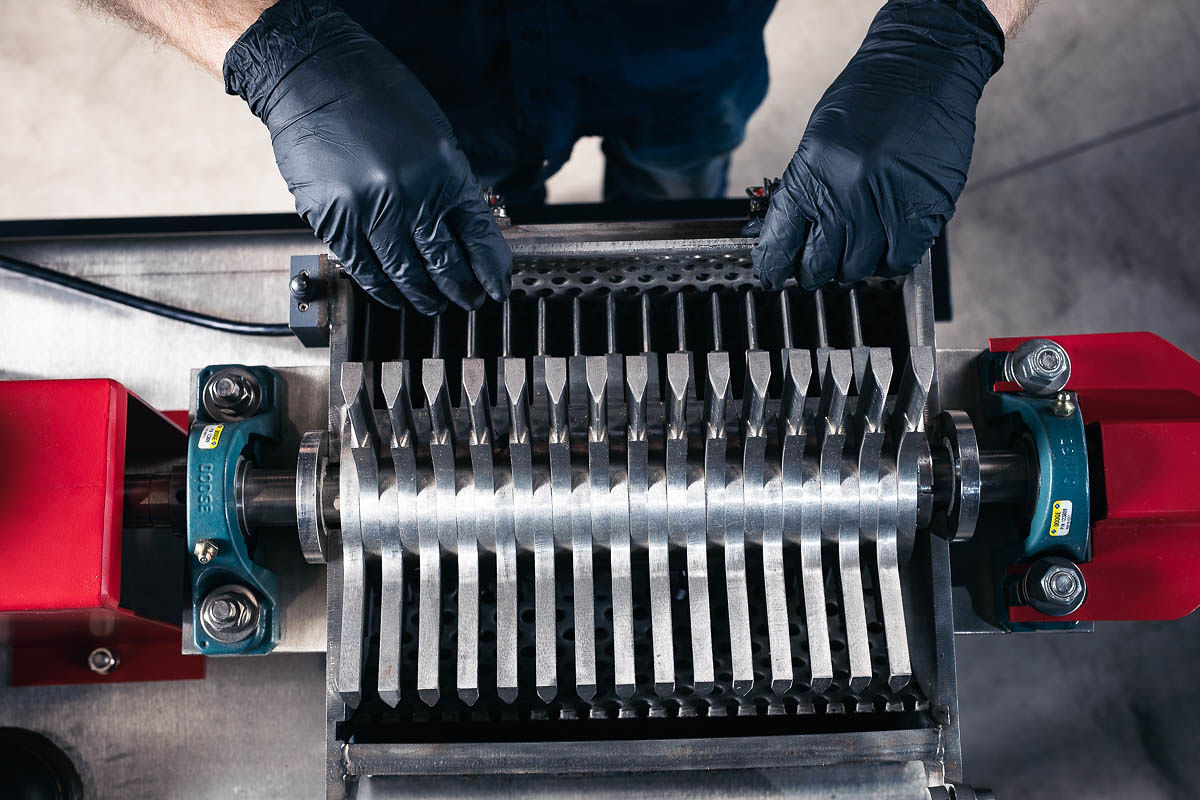
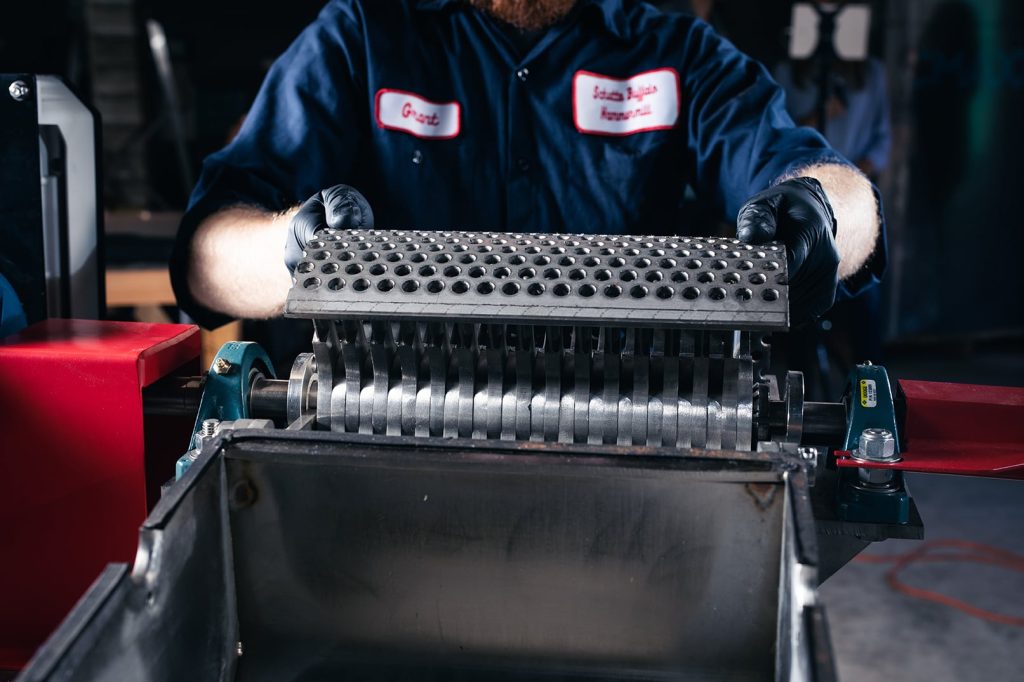
Step 5: Load the Screen
Before turning on your mill via the motor starter, make sure you have the proper screen in the mill. To access the middle assembly, remove the top bolt on either side of the mill housing. Then, release the clamp(s) on the front of your mill. Assistance may be needed for the larger mills. This is also how you perform frequent maintenance checks. Once you have a screen loaded inside your mill, close the lid of the mill, and secure the clamps and both bolts. Your KannaMill is now ready to use!
Step 6: Testing
Before processing large quantities of material, conduct a test run with a small batch. This allows you to fine-tune settings and ensures that the KannaMill is operating correctly. Pay attention to the particle size distribution and make adjustments as needed.
Step 7: Maintenance and Cleaning
Don’t forget, regular maintenance is essential to keep your KannaMill in top condition! Follow the maintenance schedule outlined in the user manual, which may include lubricating moving parts, checking for wear and tear, and cleaning the grinding chamber.
Setting up and installing your KannaMill is a straightforward process that, when done correctly, guarantees efficient and reliable cannabis grinding. By following these step-by-step instructions, you’ll be well on your way to unlocking the full potential of your KannaMill and achieving precise and consistent results in your cannabis processing operations. Remember to consult the user manual for specific details and guidelines tailored to your KannaMill model.