A KannaMill hammer mill is a robust and efficient piece of equipment designed for cannabis and hemp processing. Like any machinery, regular maintenance and cleaning are essential to ensure optimal performance and longevity. In this blog post, we’ll guide you through the steps to properly clean your KannaMill hammer mill, ensuring that it continues to deliver consistent and efficient results.
Step 1: Safety First
Before diving into the cleaning process, prioritize safety. Ensure that the hammer mill is completely shut down, and all power sources are disconnected. Lock out and tag out the equipment to prevent accidental startup during the cleaning process. Wear appropriate personal protective equipment (PPE) such as gloves and safety glasses.
Step 2: Remove Residual Material
Start by removing any residual material in the hammer mill. This includes emptying the hopper and ensuring that there are no remaining materials in the grinding chamber. Use a brush or vacuum to remove loose particles and debris.
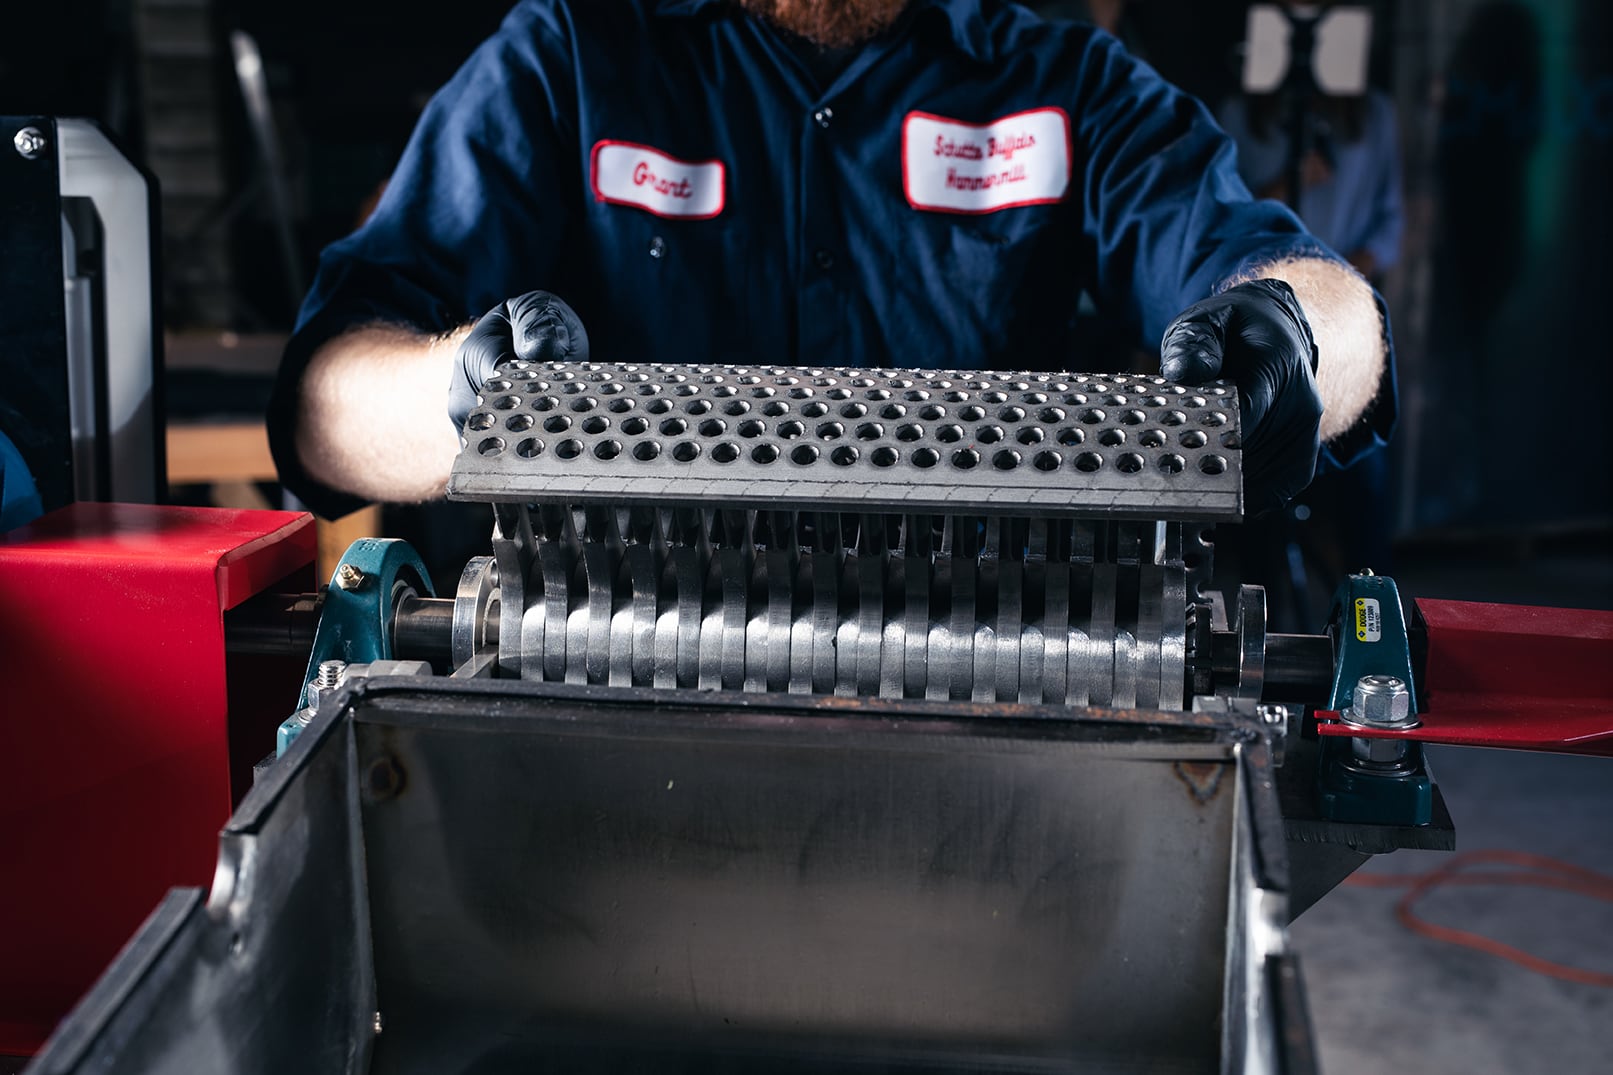
Step 3: Disassemble Components
Depending on the model of your KannaMill, you may need to disassemble certain components for thorough cleaning. Common components to disassemble include screens, hammers, and the grinding chamber. Refer to the manufacturer’s manual for guidance on proper disassembly procedures.
Step 4: Clean Screens and Hammers
Screens and hammers are critical components that influence the particle size of the final product. Clean them thoroughly to prevent cross-contamination between different batches. Soak screens in a cleaning solution and use a brush to remove any accumulated material. Wipe down hammers with a damp cloth or brush to remove any residue.
Step 5: Inspect and Replace Worn Parts
While cleaning, take the opportunity to inspect the condition of wear parts such as screens and hammers. Replace any components that show signs of excessive wear or damage. Regularly replacing worn parts is crucial for maintaining the efficiency and performance of your KannaMill.
Step 6: Clean the Grinding Chamber
Clean the grinding chamber using a vacuum or compressed air to remove any remaining particles. Be thorough in reaching all corners and surfaces. Ensure that no foreign material is left behind that could compromise the quality of future batches.
Step 7: Lubricate Moving Parts
Check the manufacturer’s recommendations for lubrication points on your KannaMill. Apply the appropriate lubricants to moving parts, such as bearings and shafts, to reduce friction and prevent premature wear.
Step 8: Reassemble the Hammer Mill
Once all components are clean and inspected, reassemble the hammer mill following the manufacturer’s guidelines. Ensure that all parts are securely tightened and properly aligned.
Step 9: Perform a Test Run
Before resuming regular production, perform a test run of the hammer mill to ensure that it operates smoothly and efficiently. Monitor for any unusual sounds or vibrations that may indicate issues with the reassembly.
Properly cleaning your KannaMill is a vital aspect of routine maintenance that ensures consistent performance and extends the lifespan of your equipment. By following these steps and adhering to the manufacturer’s guidelines, you can maintain a clean and efficient hammer mill, contributing to the success of your operations and the quality of your final product.