Revolutionizing Cannabis and Hemp Processing: Increasing Throughput with Automation

In the rapidly evolving landscape of cannabis and hemp processing, efficiency is key. As demand surges and regulations tighten, businesses are constantly seeking ways to optimize their operations to meet consumer needs while maintaining compliance. One solution that is revolutionizing the industry is automation. By harnessing the power of technology, cannabis and hemp processors can significantly increase their throughput, streamline workflows, and ultimately, improve their bottom line.

The Need for Increased Throughput

With the legalization of cannabis and hemp gaining momentum across the globe, the market is expanding at an unprecedented rate. This growth brings with it a surge in demand for cannabis-derived products, including CBD oils, edibles, topicals, and more. Consequently, processors are faced with the challenge of scaling their operations to keep pace with this escalating demand.

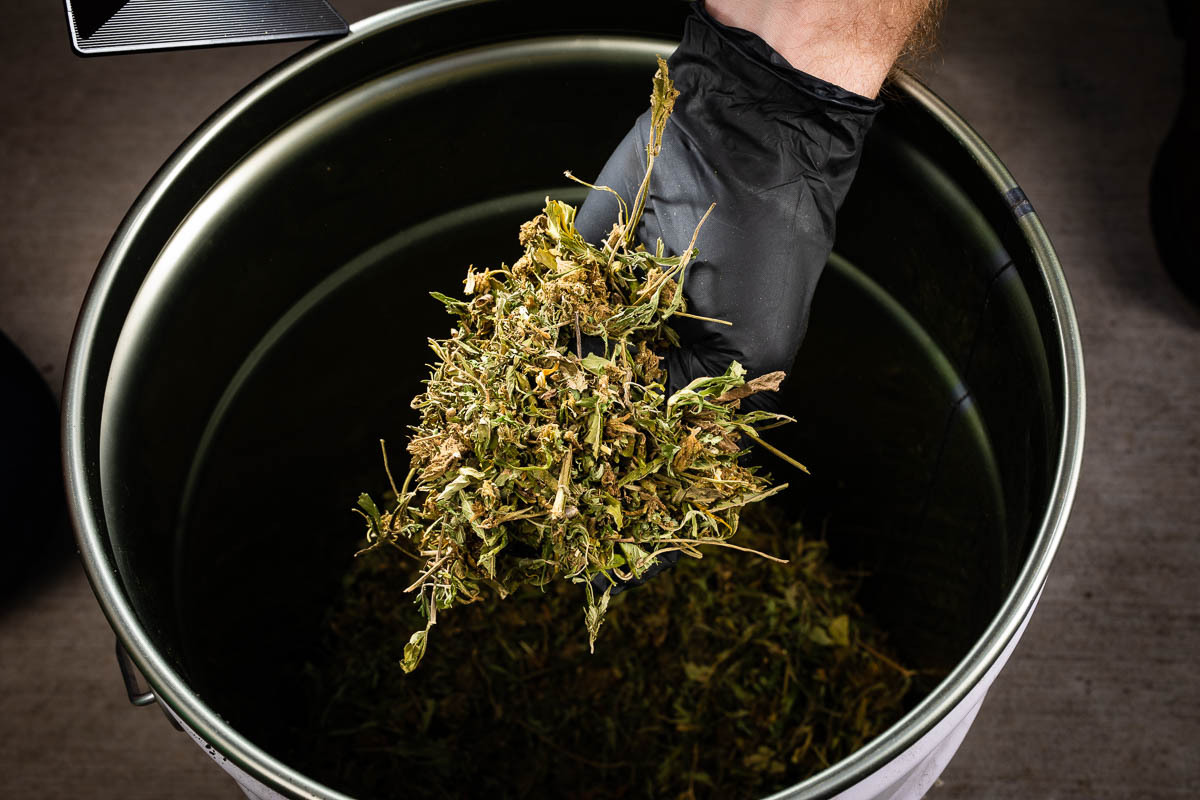
Traditionally, cannabis and hemp processing has been a labor-intensive endeavor, relying heavily on manual labor for tasks such as trimming, sorting, and extracting. However, manual processes are inherently limited by factors such as human error, labor costs, and productivity constraints. As a result, many businesses are turning to automation as a solution to these challenges.

The Role of Automation in Increasing Throughput

Automation technologies offer a range of benefits that can help cannabis and hemp processors significantly increase their throughput:

1. Precision and Consistency: Automation systems are capable of performing tasks with unparalleled precision and consistency, eliminating errors and ensuring product quality and uniformity.

2. Speed and Efficiency: By automating repetitive tasks, such as trimming and sorting, processors can dramatically increase the speed at which products are processed, leading to higher throughput and reduced cycle times.

3. Scalability: Automation solutions can easily scale to accommodate growing production volumes, allowing processors to ramp up their operations to meet increasing demand without incurring significant additional costs.

4. Compliance: Automation systems can be designed to adhere to strict regulatory requirements, ensuring compliance with industry standards and minimizing the risk of costly penalties or product recalls.

Examples of Automation in Cannabis and Hemp Processing

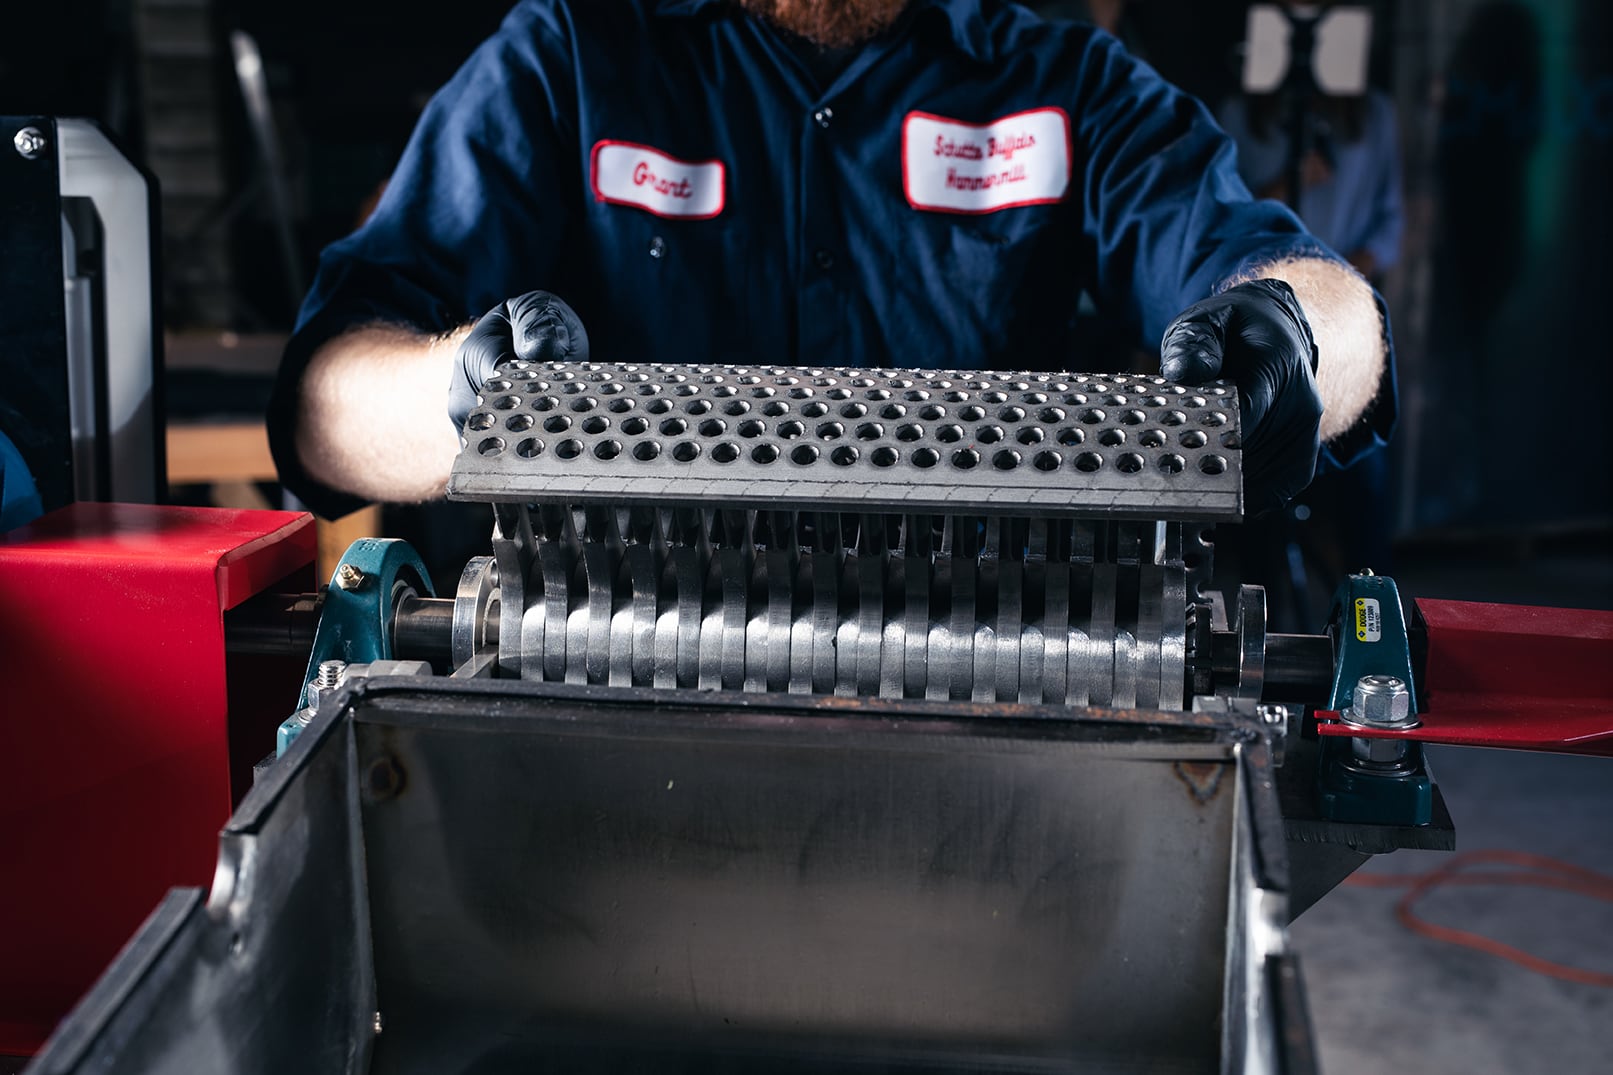
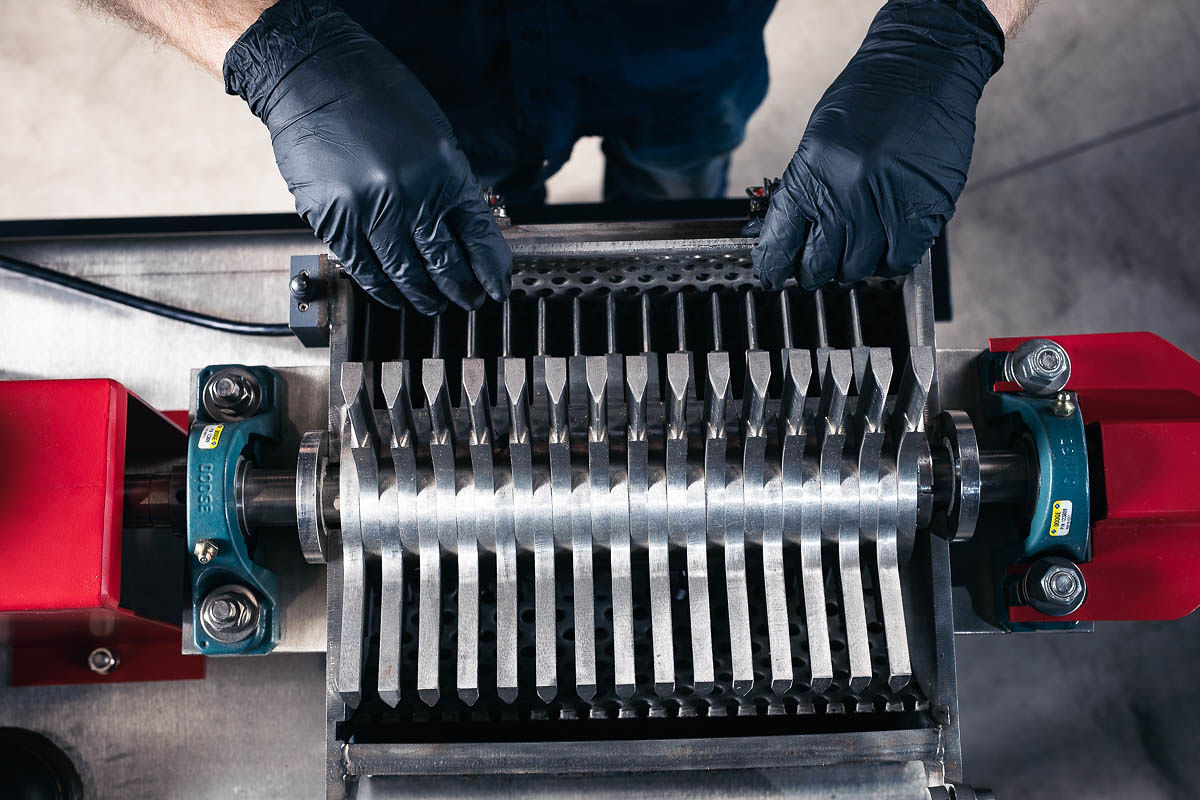
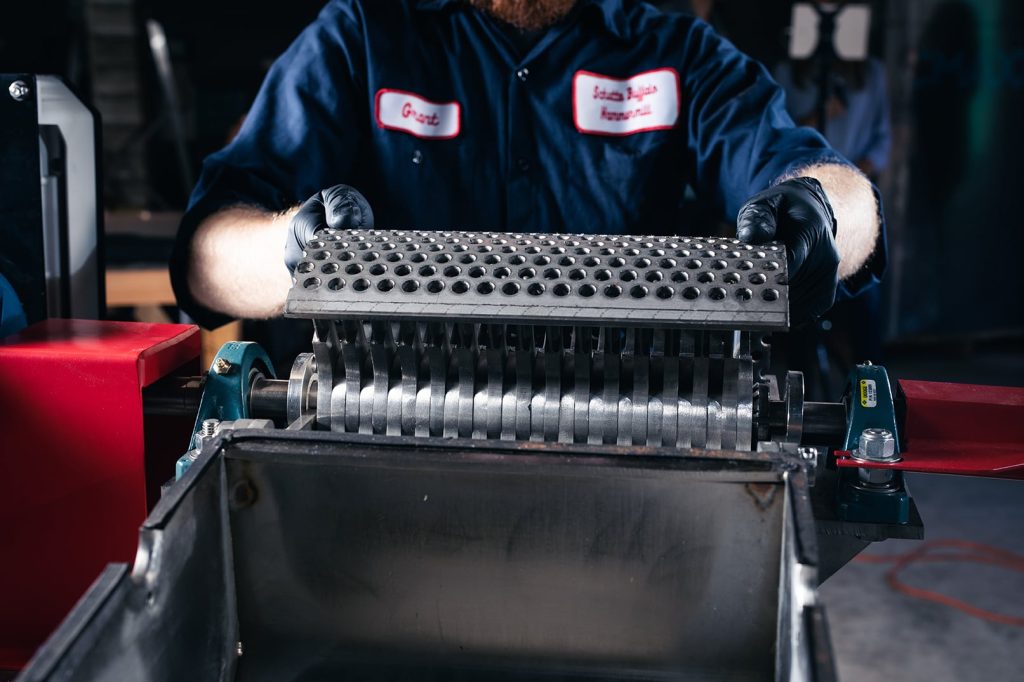
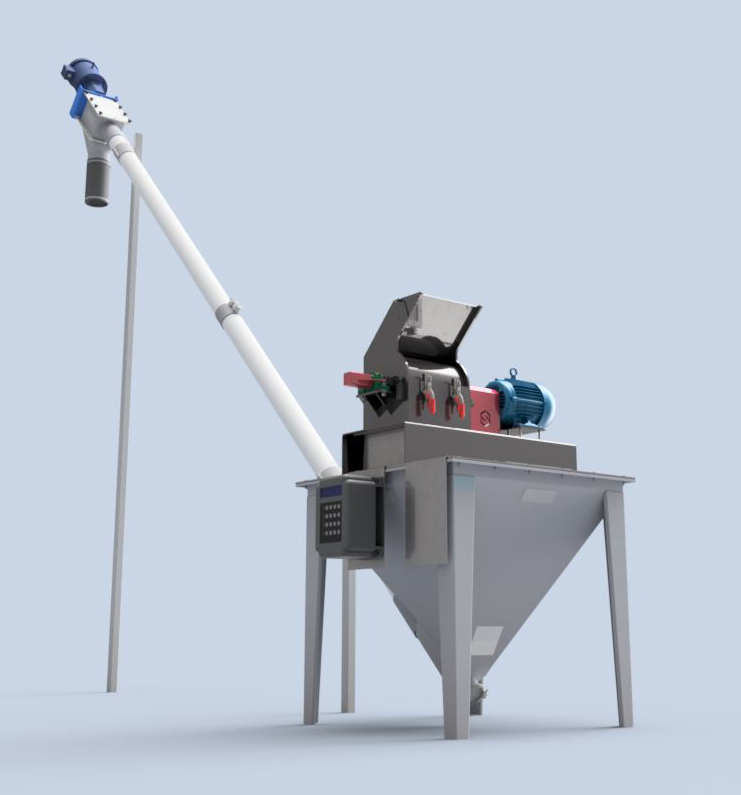
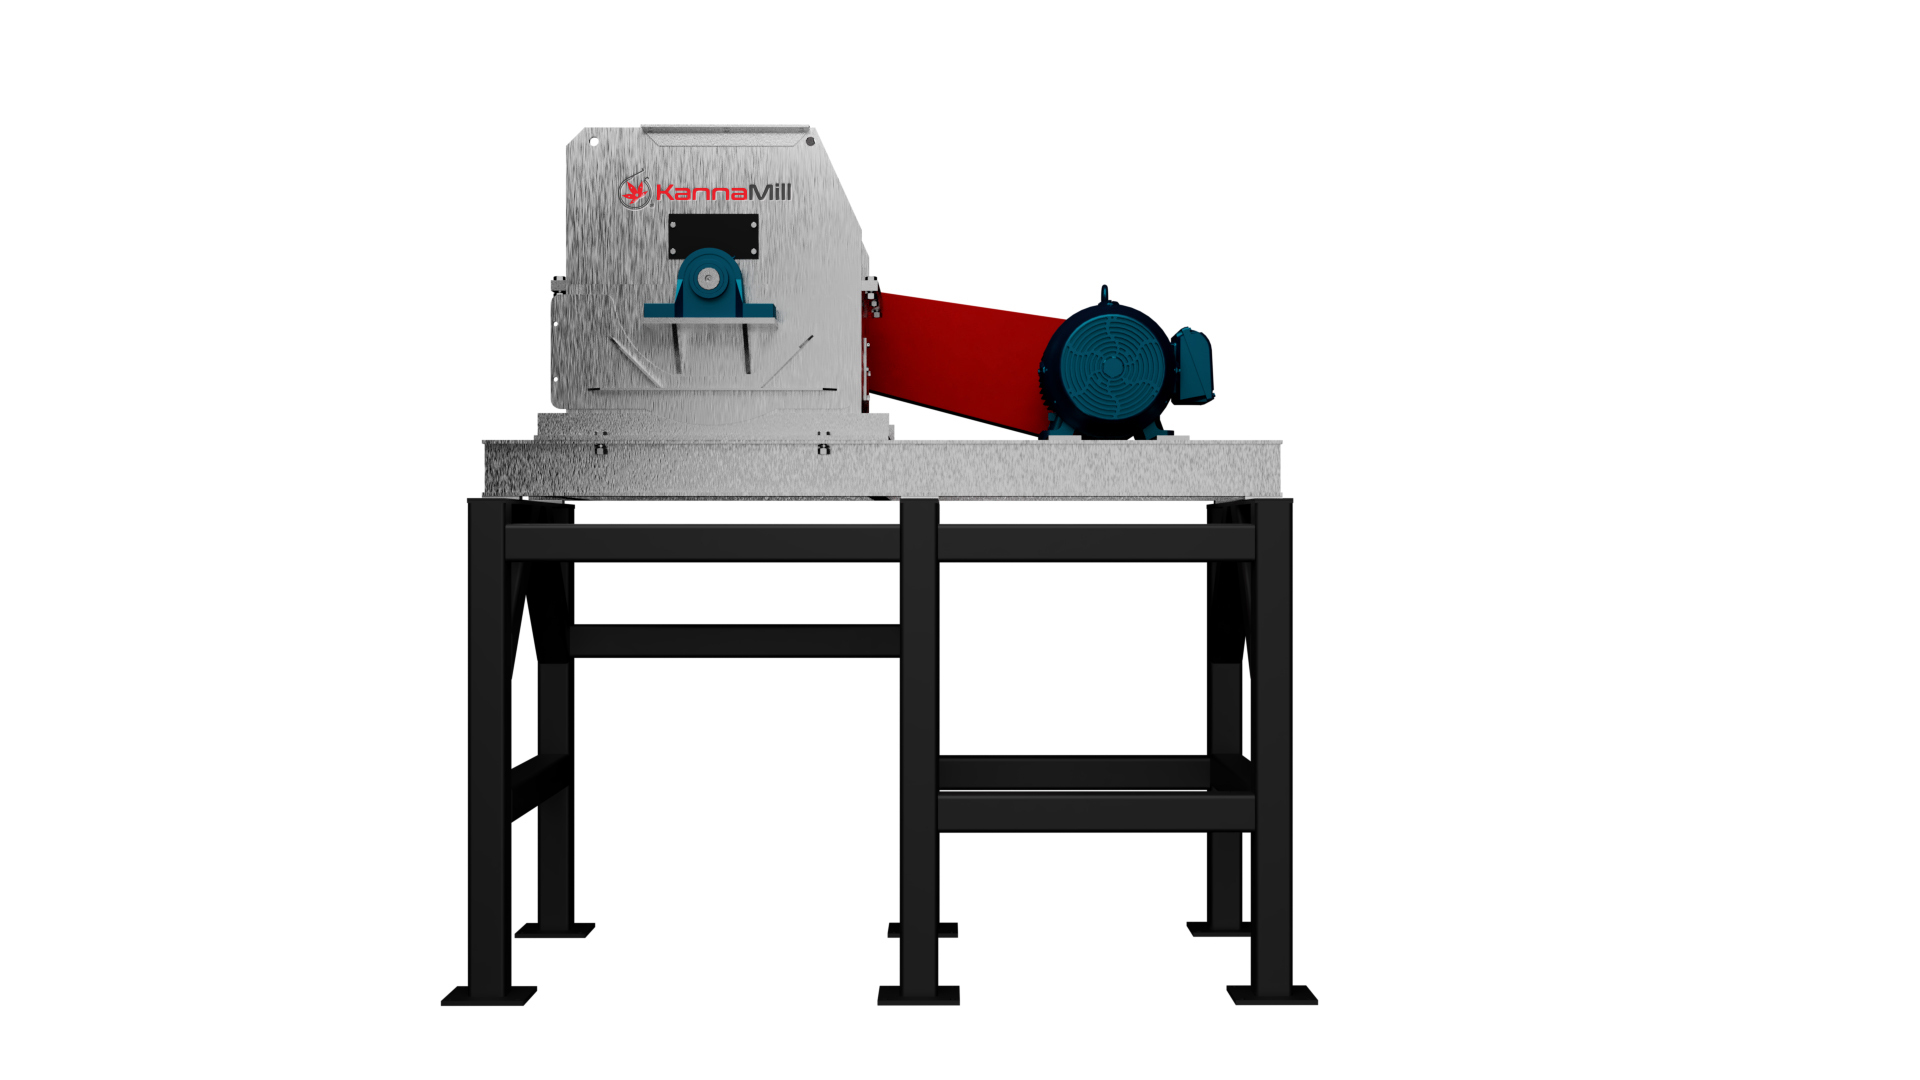
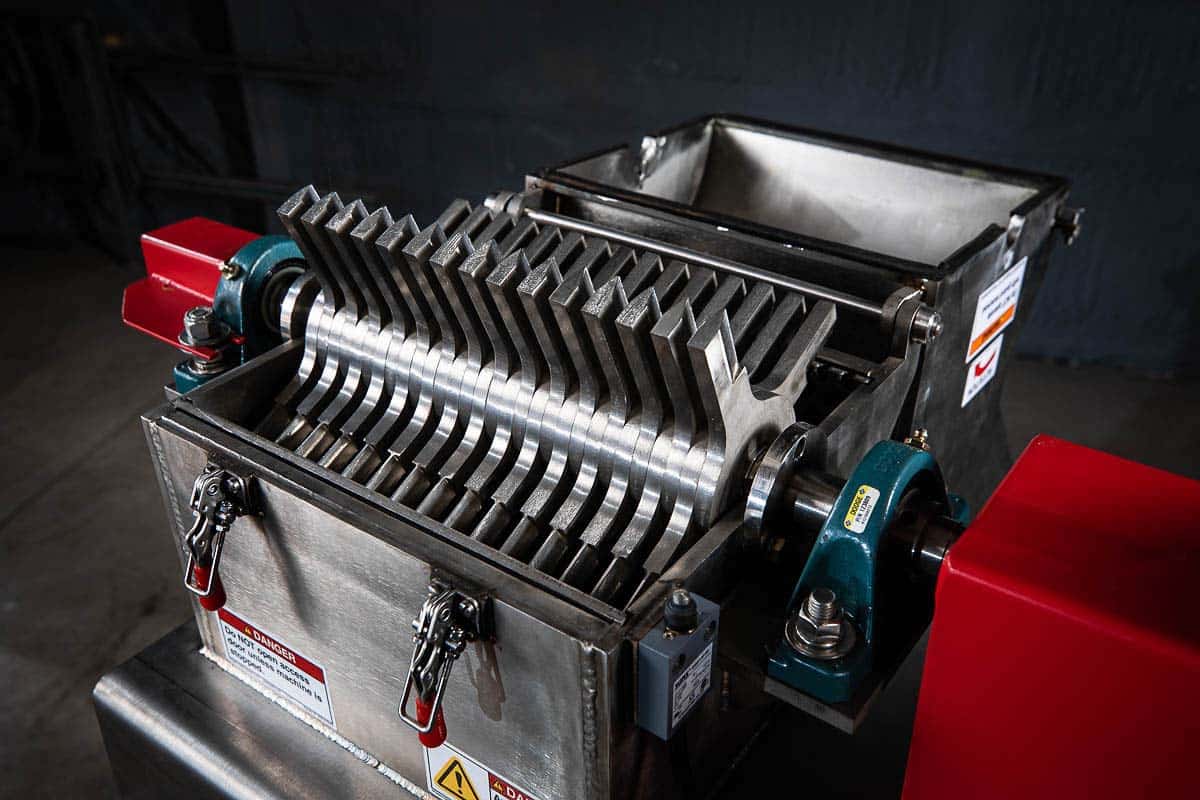
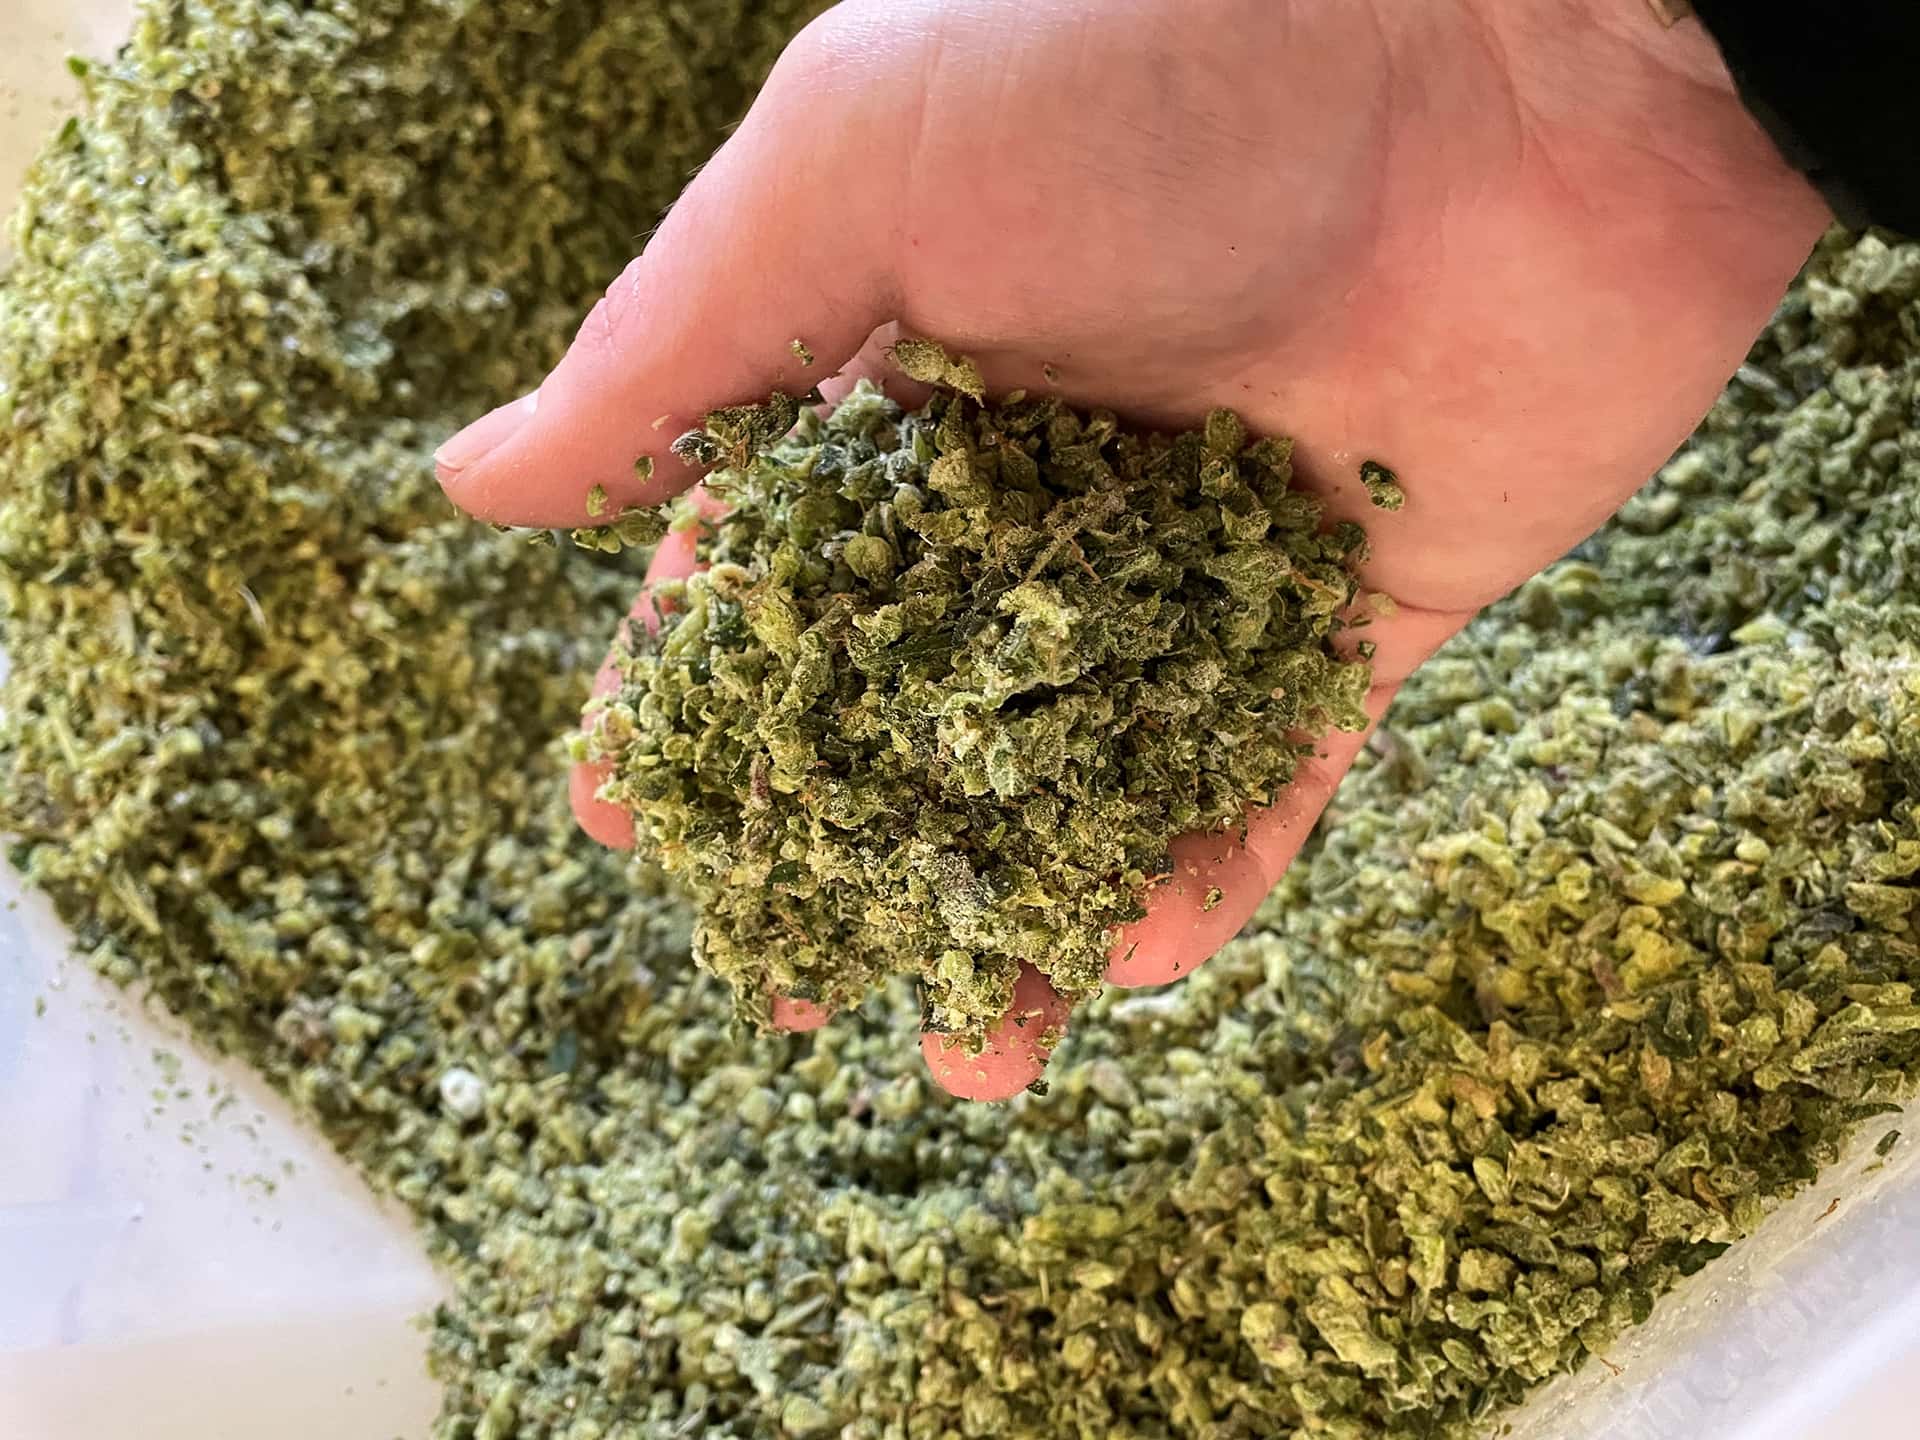
1. Automated Trimming Machines: These machines use advanced algorithms and robotics to precisely trim cannabis flower, significantly reducing the time and labor required compared to manual trimming.

2. Extraction Systems: Automated extraction systems utilize closed-loop technology to efficiently extract cannabinoids and terpenes from plant material, maximizing yield while minimizing solvent usage and processing time.

3. Sorting and Grading Systems: Automated sorting systems use computer vision and machine learning algorithms to quickly and accurately sort cannabis and hemp biomass based on various criteria such as size, color, and potency.

Conclusion

In an industry where efficiency and scalability are paramount, automation offers a compelling solution for increasing throughput and staying competitive. By harnessing the power of technology, cannabis and hemp processors can streamline their operations, improve product quality, and meet the growing demands of the market.

At KannaMill, we are committed to providing cutting-edge automation solutions that empower cannabis and hemp processors to achieve new levels of productivity and efficiency. Whether you’re a small-scale producer or a large-scale operation, our customizable automation systems are designed to help you maximize throughput, minimize costs, and unlock new opportunities for growth in this dynamic industry.

Maximizing Efficiency: Exploring Material Collection Upgrades for KannaMill

In the world of cannabis processing, KannaMill has proven itself as a reliable workhorse, providing processors and extractors with top-notch performance. As technology continues to evolve, so do the demands of material collection systems. In this blog post, we’ll delve into the importance of material collection upgrades for KannaMill and explore how these enhancements can significantly boost efficiency and streamline the overall processing workflow.

The Evolution of Material Collection Systems:

Efficient material collection is a critical aspect of any processing system, and KannaMill is no exception. As the cannabis and hemp processing industry seeks to optimize operations, upgrading material collection systems becomes a strategic move to improve overall productivity and reduce downtime.

Key Advantages of Material Collection Upgrades for KannaMill:

1.  Enhanced Dust Control: Dust control is a paramount concern in material processing environments. Upgraded material collection systems for the KannaMill incorporate advanced technologies to minimize dust emissions, creating a cleaner and safer workspace for operators.

2.  Increased Yield Recovery: Material losses during processing can impact overall yield and profitability. Upgrades to the material collection system aim to maximize the recovery of valuable materials, ensuring that every processed particle contributes to the final product.

3.  Optimized Throughput: An efficient material collection system ensures that processed materials are swiftly and systematically collected, allowing for uninterrupted operation and optimal throughput. This is particularly crucial for operators with high-volume processing requirements.

4.  Adaptability to biomass variability: Upgraded material collection systems for the KannaMill are designed to accommodate a diverse range of plant material. This adaptability is essential for operators that process different types of biomass with varying infeed sizes and properties.

5.  User-Friendly Features: State of the art material collection upgrades for the KannaMill come with operator-friendly features, such as easy maintenance, quick access for cleaning, and intuitive controls. These enhancements contribute to a smoother operation and reduce the time required for routine maintenance tasks.

In the dynamic landscape of cannabis and hemp processing, staying ahead requires a commitment to continuous improvement. Material collection upgrades for KannaMill offer a pathway to increased efficiency, reduced environmental impact, and enhanced overall performance. As the industry evolves, so too must the technologies that support it, and these upgrades serve as a testament to the dedication to excellence in the field of biomass processing with the KannaMill.

A Clean Slate: A Guide to Properly Cleaning Your Kannamill Hammer Mill

See our video on YouTube

A KannaMill hammer mill is a robust and efficient piece of equipment designed for cannabis and  hemp processing. Like any machinery, regular maintenance and cleaning are essential to ensure optimal performance and longevity. In this blog post, we’ll guide you through the steps to properly clean your KannaMill hammer mill, ensuring that it continues to deliver consistent and efficient results.

Step 1: Safety First

Before diving into the cleaning process, prioritize safety. Ensure that the hammer mill is completely shut down, and all power sources are disconnected. Lock out and tag out the equipment to prevent accidental startup during the cleaning process. Wear appropriate personal protective equipment (PPE) such as gloves and safety glasses.

Step 2: Remove Residual Material

Start by removing any residual material in the hammer mill. This includes emptying the hopper and ensuring that there are no remaining materials in the grinding chamber. Use a brush or vacuum to remove loose particles and debris.

Step 3: Disassemble Components

Depending on the model of your KannaMill, you may need to disassemble certain components for thorough cleaning. Common components to disassemble include screens, hammers, and the grinding chamber. Refer to the manufacturer’s manual for guidance on proper disassembly procedures.

Step 4: Clean Screens and Hammers

Screens and hammers are critical components that influence the particle size of the final product. Clean them thoroughly to prevent cross-contamination between different batches. Soak screens in a cleaning solution and use a brush to remove any accumulated material. Wipe down hammers with a damp cloth or brush to remove any residue.

Step 5: Inspect and Replace Worn Parts

While cleaning, take the opportunity to inspect the condition of wear parts such as screens and hammers. Replace any components that show signs of excessive wear or damage. Regularly replacing worn parts is crucial for maintaining the efficiency and performance of your KannaMill.

Step 6: Clean the Grinding Chamber

Clean the grinding chamber using a vacuum or compressed air to remove any remaining particles. Be thorough in reaching all corners and surfaces. Ensure that no foreign material is left behind that could compromise the quality of future batches.

Step 7: Lubricate Moving Parts

Check the manufacturer’s recommendations for lubrication points on your KannaMill. Apply the appropriate lubricants to moving parts, such as bearings and shafts, to reduce friction and prevent premature wear.

Step 8: Reassemble the Hammer Mill

Once all components are clean and inspected, reassemble the hammer mill following the manufacturer’s guidelines. Ensure that all parts are securely tightened and properly aligned.

Step 9: Perform a Test Run

Before resuming regular production, perform a test run of the hammer mill to ensure that it operates smoothly and efficiently. Monitor for any unusual sounds or vibrations that may indicate issues with the reassembly.

Properly cleaning your KannaMill is a vital aspect of routine maintenance that ensures consistent performance and extends the lifespan of your equipment. By following these steps and adhering to the manufacturer’s guidelines, you can maintain a clean and efficient hammer mill, contributing to the success of your operations and the quality of your final product.

A Step-by-Step Guide to Setting Up and Installing Your KannaMill

In the rapidly evolving world of cannabis processing, the KannaMill stands out as a reliable and efficient solution for precision grinding. Whether you’re a seasoned professional or a newcomer to the industry, setting up your KannaMill correctly is crucial for optimal performance. This step-by-step guide will walk you through the process, ensuring you unlock the full potential of your KannaMill.

Step 1: Unboxing and Inspection

Begin by carefully unpacking your KannaMill and inspecting all components for any signs of damage during shipping. Verify that you have received all the necessary parts listed in the user manual.

Step 2: Placement 

Choose an appropriate location for your KannaMill. Ideally, it should be placed on a stable surface with ample ventilation. Ensure there is enough space around the mill for easy access and maintenance. Additionally, it is important to keep in mind that you need to have the proper power available within your space. Our KannaMill 4 only requires single phase power, while the KannaMill 12 and 16 require three phase power.

Step 3: Assembly

When assembling the mill, ensure all connections are secure and follow the manual’s guidelines to avoid any potential issues during operation. Assembly typically involves the following steps:

  1. Locate the casters that came with the machine and bolt these with the supplied hardware to each stand leg.
  2. If the mill itself was shipped without being bolted to the stand, use a crane or fork truck to lift the mill and place it on top of the stand. Be sure to line up the holes properly to make the next step go smoothly.
  3. Locate the supplied hardware and bolt the mill to the stand.
  4. The discharge chute should also be separate from the mill itself and should be bolted to the underneath of the mill with the supplied hardware.
  5. Locate the flex hose, clamps, and collection bin. Place a clamp on to the discharge chute and lock in one end of the flex hose to the chute. The other end of the flex hose connects to the larger port of the collection bin.
  6. Remove the dust collector that was included with the mill and follow the install instructions. The hose will connect to the smaller port on the lid of the collection bin. Make sure you use either the foam filter inside the dust collector, or the paper filter that was provided, but not both.
  7. The collection bin should be placed beneath the mill with the flex hose perpendicular to the ground.

Step 4: Connection the Power (Plug it in)

Connect your KannaMill to a reliable power source as specified in the user manual. Double-check the voltage requirements to avoid damaging the equipment. Make sure to use the provided power cord and follow all safety precautions outlined in the manual. If your mill requires three phase power, please contact an electrician to hardwire a plug to the supplied motor starter. An outlet on the closest wall should also be supplied by the electrician. Once you have power going to your mill, take a moment to get familiar with the motor starter by referencing the supplied owner’s manual that came with the mill. Please note, your mill is either programmed for 1800 or 3600 rpm’s.

Step 5: Load the Screen

Before turning on your mill via the motor starter, make sure you have the proper screen in the mill. To access the middle assembly, remove the top bolt on either side of the mill housing. Then, release the clamp(s) on the front of your mill. Assistance may be needed for the larger mills. This is also how you perform frequent maintenance checks. Once you have a screen loaded inside your mill, close the lid of the mill, and secure the clamps and both bolts. Your KannaMill is now ready to use!

Step 6: Testing

Before processing large quantities of material, conduct a test run with a small batch. This allows you to fine-tune settings and ensures that the KannaMill is operating correctly. Pay attention to the particle size distribution and make adjustments as needed.

Step 7: Maintenance and Cleaning

Don’t forget, regular maintenance is essential to keep your KannaMill in top condition! Follow the maintenance schedule outlined in the user manual, which may include lubricating moving parts, checking for wear and tear, and cleaning the grinding chamber.

Setting up and installing your KannaMill is a straightforward process that, when done correctly, guarantees efficient and reliable cannabis grinding. By following these step-by-step instructions, you’ll be well on your way to unlocking the full potential of your KannaMill and achieving precise and consistent results in your cannabis processing operations. Remember to consult the user manual for specific details and guidelines tailored to your KannaMill model.

Increasing Throughput using Automation

Our KannaMill Pilot series mills require feeding material by hand and collecting material in small collection bins. To help automate this process, we now offer a Surge Hopper/Flex Auger add-on for our Lab and Pilot series mills. For our KM-12 and KM-16 models, we can retrofit the mill to utilize this setup for either the in-feed, the discharge, or both. By adding this hopper and auger configuration, you can expect an increase in productivity and the flexibility of filling extraction socks/vessels, 55-gallon drums, and super sacks, to name a few.

The Surge Hopper is manufactured in 304 Stainless Steel, measures 36” square by 38” high and offers 8 cubic feet of hopper capacity. This hopper configuration offers optional upgrades for agitation, proximity level switch, and a turbine vibrator. The Flex Auger comes as a standard 15′ long with the ability to customize the length. The outer diameter of the auger measures at 4 ½” and is made of polyethylene. The auger runs on a 3HP, 1725 RPM motor with the option of upgrading to a VFD. All the fittings and transitions are included, and all wiring is completely enclosed.

We partnered with one of the industry leaders in conveyor equipment which offers a quick ship program. This program helps cut down on long lead times and expedites the equipment modifications needed for your KannaMill. Contact us for more info.

Why is grinding necessary?

Why is grinding necessary?

A common question we get is, “How can I achieve consistent particle sizes?” It always points to milling or grinding as being the cheapest and most efficient way. There are several reasons why milling biomass is important for extraction, prerolls, building materials, and several other uses. Below are a few examples.

Extraction:

  1. The density increases when the biomass is milled. This means more material can be packed into extraction vessels.
  2. Milling can provide tight particle size distributions, which helps increase efficiency during the extraction process.
  3. The two most common extraction methods (CO2 and Ethanol) require different particle sizes. For example, CO2 extraction requires a smaller uniform size to prevent channeling within the extraction vessel whereas Ethanol extraction requires larger particle sizes for maximum absorption.

Prerolls:

  1. Consistent particle sizes help provide ease of filling the cones used in prerolls.
  2. A coarse particle size is needed for prerolls to provide the consumer with an even burn without “canoeing”. A simple screen change and RPM alteration on the mill can ensure the operator will achieve consistent sizes rather than fine powder.
  3. Uniformity can also eliminate unwanted stems that usually puncture the wrapper of the preroll. This eliminates stress on QC and helps maintain uptime in production.

To hear about what KannaMill does differently than other processing companies, reach out to us at 800-447-4634 or email us at [email protected].

Kannamill Pilot Series

The KannaMill Pilot Series offers a throughput range of 500 – 1,000 lbs/hr. Various models within our KannaMill, 13 and WA equipment lines fall within this range. The three different hammer mill styles can tackle a wide range of applications including, but not be limited to; flower and trim for extraction, pre-rolls, and fresh frozen. This series works best for operations more than 10 acres.

Full plant material can be processed through our 13 hammer mill which comes with a user friendly 45-degree infeed chute and an integral fan built on to the shaft of the motor. This mill offers a low footprint and can be tied into most existing Cyclone’s for material separation.

We have a current customer, a New York state farmer, that utilizes our 13 model hammer mill to break down Hemp biomass to achieve a uniform particle size for various applications including animal bedding and building insulation. This rugged model is built to work through tough and aggressive plant matter.

Reach out to us today to learn more about our Pilot Series and which equipment line would work best for your application.

Welcome to KannaMill 2.0

Since launching KannaMill back in 2017, the industry has changed dramatically. Over the past 4 years, we have collected feedback from our customers, met with industry leaders, participated at tradeshows and established where we elevate the process with our technology. As the industry continues to evolve, we decided now was the time to refresh the KannaMill brand and update the look and feel. We started with the equipment that sets us apart from others with an updated look, improved collection drum, and optimized processing rates with our hopper/auger setup. We took our most valuable piece of communication, KANNAMILL.COM, and revamped the entire site to mirror the new brand standards. The site is now easier to navigate and to understand why our KannaMill equipment is used for extraction, prerolls, fresh frozen, and hemp building materials to name a few. The refreshed site is clean and simple, while still providing the important information that our customers look for when researching size reduction equipment and ultimately connecting you with a KannaMill rep to talk through your wants and needs.

Fresh Frozen Processing

The industry is evolving, and processors continue to look for that next big product to capture more customers. Higher quality flower is more common now than it has been in the past. “Craft” flower, as some end-users call it, has more upside than the cheaper low-quality flower the average consumer is used to.

When it comes to curing, the most common method is air-drying. There are some variations of this method, but the most common way is to hang the biomass, stripping away the larger leaves, allowing it to dry in a dark room under controlled conditions for a few weeks. The flower is then “bucked” and sealed in a closable sealed container. An alternative method to this is Fresh Frozen which uses fresh harvested material that is separated from leaves, branches, and stems. The material is then vacuum sealed in bags and placed into industrial freezers set at around -38 degrees Fahrenheit. This task preserves terpenes, cannabinoids, and flavor profiles. (source: Giving Tree Farms) Once a processor decides to extract from this material, a KannaMill is recommended to bring the material down to a uniform particle size. Through trials with processors on the West Coast, KannaMill was able to identify optimal parameters to maintain low internal mill temperatures providing consistent output particle sizes. A traditional Hammermill uses blunt hammers and is known to generate heat and over-pulverize the material. With KannaMill’s beveled hammers, we can efficiently knife through the material quickly to allow for low dwell times within the mill.

Reach out to KannaMill to start discussing your Fresh Frozen milling project.